Sunday, April 25, 2021

550 Paracord Nalgene Bottle Holder


Staying ready for the trails with this 550 paracord bottle holder with drawstring handle!  I used a really cool paracord color called kalidescope and there is over 115’ of paracord in the bottle holder with additional paracord for the drawstring and handle.

I used one continuous piece of cord for the bottle holder.  If you ever need to use the cord, remove the drawstring and handle, then you will find the end cord at the top of the inside of the holder.  It’s designed to rapidly deploy by finding the end cord at the top and there will be a knot at the end of it.  Once that is unknotted and pulled up, the holder can easily be pulled apart.

These bottle holders can also be used for storing and carrying various items like flashlights and camping supplies.

#Paracord bottle holder #Nalgene bottle holder #Hiking gear #550 Paracord bottle carrier #wearartbyjulie.etsy.com

Tuesday, July 28, 2020

Mini-Paracord Jagermeister Bottle Holder


I’m wondering if you’ve ever heard that old saying, “Busy hands, busy minds?”  It is exactly what it says.  When you are busy doing something, your mind shifts to that little project.  There can be the joy of thinking of making something, digging around for the supplies and sitting there at any time and just getting to work.  I kind of envy those people who can sit and read fiction books, but I stick to the non-fiction and make things.  Either way, it can be an escape from the news of the day which as you know, isn’t always positive.  So we have to think positive and stay positive.  It’s a good idea to protect the temple and I’ll consider that my mind and body.

I don’t drink Jager, but I know people who do.  I usually don’t collect too much, but I do wash and keep some little bottles here and there that I might use for a fun project like this.  The bottle here is one of those tiny sample sizes.

I used an OD green US made micro paracord which is basically a 2mm cord.  It does have an inner strand which gives it that little bit of extra strength.  The bottle holder has approximately 30” of cord in it that can be used in an emergency or survival situation.  You never know when you may need extra cordage, so I like to keep extra items such as this in my backpack or tool box.

You can unknot or cut the drawstring holder and pull that out, then find the red marked cord.  That is the cord you will pull up and out.  Once you pull that slip knot out, you can rapidly deploy the entire or part of the bottle holder.  You can use this cord for so many things.

I’ve made bottle holders like this in the 550 paracord for Nalgene bottles.  Though these are a lot smaller, they are a little more challenging to make because they are so tiny.  Hope you enjoy the photos!  #microparacord #paracordbottleholder #koozie #jager #jagermeister #outdoorsman #survivalgear #paracordart #wearartbyjulie.etsy.com

Saturday, July 18, 2020

Micro Paracord Cross Colors


I’ve been working on some samples in various colors.  
I have so many warm earth tone colors that vary from browns to copper to shades of green.
#Paracord Cross #Microparacord cross #Paracord Rosary

Sunday, July 5, 2020

Paracord Crosses in 550


These are examples of the crosses with the knotted cord in 550 paracord.  This cord does vary quite a bit as far as softness, thickness being milspec and so on.  The copper cord is what I would consider a heavier or thicker barrel which is the outer core.  I removed the inner strands of the paracord before I made the rosary style cross.  This makes the paracord tie closer and looks a bit more like knotted ribbon.  The black cross is made of a 550 paracord and it still contains the inner strands.  This paracord is a bit lighter and softer to the touch.  It has all the 550 strength, but has a thinner barrel.  This cord works well for this project.  The thicker the cord, the larger the knots will look.  It’s really good to experiment with different types of cord and see how they work with various pieces.

These are made from one piece of paracord and this is my own design.

Friday, May 15, 2020

Sterling Floral Impression Earrings


These are all sterling silver with various floral impressions I milled onto the metal.  I use an actual steel mill to create these delicate designs.  I added patina and gently removed the excess.  I hand made the ear wires by hammering the tips, gently shape, cut the ends, file, hammer and sand.  I make everything by hand and it takes more time, but I can really see and feel the difference.  I used beautiful fresh water pearls in various colors for the dangles.  You may notice some shimmering Swarovski crystals.  These have been shipped to a local museum shop and hopefully when the shop reopens, they will become cherished little treasures to someone.  #floralimpressions #naturejewelry #handmadeearrings #wearartbyjulie #leafjewelry

Sunday, May 10, 2020

Micro Paracord Crosses


I’ve made these over the years and some will have the ten knots to symbolize the decades of a rosary and I also make them without knots.  The colors pictured here are coyote, foliage and OD green.  I make these with one single strand of micro paracord.  It’s a pattern that I thought out in my head while on a ride up to the mountains one day.  I will be listing some of these on my Etsy shop and if you have any questions please comment or convo me.  Take care everyone during these times.  Sending you blessings and good health.  #paracordcross #wearartbyjulie.etsy.com #paracordrosary #soldierscross #cobraknotcross #macramecross #Catholiccross

Thursday, November 15, 2018

Handmade Heirloom Christmas Ornaments

Here are some steps of making my very special heirloom Christmas ornaments!  I shape and form the metal, add some twists and scrolls and this one features all Swarovski crystals.  The final patina was added and the shine was hand finished.  I will be delivering some of these to the Shemer Art Center in Phoenix very soon!  #handmadeornaments #Christmasornaments #VictorianChristmas #DowntonAbbey #ornamentalironwork #shemerartcenter #edwardianfashion #edwardianjewelry #newvintage #gibsongirl #myheartwillgoon #metalscrolls #Arizonamakers #decorativeironwork #swarovski #holidaydecor #suncatcher

Art Nouveau Inspired Pendant in Copper

What's old is Nouveau again... I was sitting down the other night and as usual, it was rather late.  I was trying to make a completely different design and something I wouldn't normally make.  In order to grow, it's true that we have to push the limits a bit.  Still, what I was trying to practice didn't come together after a few tries.  Pause... I then thought I would just do something different.  I came up with something that somehow, looked very Art Nouveau inspired.  The thing I didn't force, just kinda happened and I feel it was much better than what I was trying to make.  We are always learning, growing, backpedaling, then bouncing back.  The path winds and we find our way.  This was made with two base pieces of heavy copper wire.  I then used one long piece to anchor the few bottom crystals, then worked my way up.  These are all Swarovski Crystals.  This can be a pendant, made into a brooch or even used as a Christmas ornament.  #Artnouveau #Paris #Metro #newvintage #christmasdecor #edwardian #Titanic #metalscrolls #bohemiancrystals #Swarovski #arizonamaker #edwardianfashion #handformedmetal #Royals #Downtonabbey #copperjewelry #wirejewelry

Friday, August 7, 2015

Finished Sterling Silver Filigree Crosses


So, here is the one larger cross I just finished and the other one with the large amethyst briolette.  I really like the layers of scrolls and fine gauge wire that holds all of it together.  These pendants are currently listed at wearartbyjulie.etsy.com.


Before, During and After Patina...


Progress on the Filigree Sterling Cross

At this point, I had finished building this piece.  Showing front and reverse detail.


Filigree Sterling Silver Cross in Progress

I've listed this pendant on my Etsy shop, but they only allow five images.  How could just a handful of images show the work and detail that goes into making a piece like this?  So, I'm posting some photos here!

You will see some of the initial scroll layers have been added, but there will be more layers of scrolls on top and under these.  I also added many sterling silver beads by essentially sewing them to the piece.  The two wires coming out of the top were made into the bale.


Saturday, July 25, 2015

Fold Forming Organic Copper Leaves


Here are some photos of the various steps of working on some fold formed copper leaves.  I started with 24 gauge copper sheet that I milled to thin.  It's possible to start thinner at a 26 to 28 gauge.  It just depends on how much texturizing or hammering you will do.  The metal will thin out as it's worked or milled.

There are so many ways to cut and shape pieces like this.  I wanted my pieces to have waves like dry leaves.

It's a process to do this because you anneal the metal, work it a bit, anneal and work some more.  This was a super fun way to add a lot of dimension.


Thursday, July 16, 2015

Copper and Stone Pendants Cold Connection


The top pendant was a simple coiled piece of copper I had hammered accents on.  I decided to get creative by adding a round bead to the center.  I threaded the stone with wire, wrapped it, coiled the ends and tucked it under.  I did something similar with the bale.  This seemed to add a lot of interest to the metal by connecting various pieces of metal without heat.

The second pendant also features labradorite that has been wrapped into a bale.  I used the same bead plus some Czech glass beads at the bottom.

The bottom pendant is copper and I had milled a laurel leaf onto it.  I bent the milled stem section of the leaf back to form a bale.  I made a wire wrapped bead for an accent and used a nice fluorite for the dangle.  These all started out as simple ideas and the little accents added layers of interest.


Bracelets and More in the Works

I've milled my favorite leaves onto copper for some bracelets that are in the works.  The other pieces were milled, cut and annealed for various projects.  The smaller pieces are for a special project.  I can never be without a Sharpie and they are on the bench, tucked in my pockets, in my pack, tool box and so on.  Pictures to follow!


Thursday, June 4, 2015

Turquoise in Polymer Clay with Micro Paracord Bracelets

I taught a workshop in Phoenix a couple of weeks ago and we made faux turquoise of polymer clay.  We made a lot of other things as well, but the turquoise is just so fun!

The polymer clay is put in a food processor, then pressed back together.  *Just a reminder that any tools used for polymer clay will then be dedicated for polymer clay. 

The results will vary on how finely ground the clay is and how you roll or press it back together.  There are so many things you can do with this such as beads, slab pieces and accent strips.

The pieces are cured, stained, wet sanded and buffed on a jewelers wheel.  There is a bit of labor and several steps involved, but the results are really nice.  Many people think this is real turquoise, then I tell them it's polymer clay.

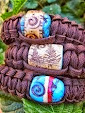
I used a micro paracord for the bracelets with black clips in the back.  This is more of a herringbone type weave and it takes a little longer to tie vs. the basic macrame or cobra knot.  This makes a really fun and rugged piece of wearable art.  The bracelet can be untied and the cordage may be used for various utility needs.  This may also be called a survival style bracelet which is really popular with the hikers and campers!

Southwestern Pot Beads in Polymer Clay


I recently made a series of my Southwestern Pot Beads in polymer clay.  These are a similar style to the beads I had published in "1000 Beads" by Lark Books last year.

I mixed all the colors, created the stripe accents, sculpted, used my own custom stamps for the tops and added all the accent lines by hand.  These were cured, stained, sanded and buffed to polish.

I made bracelets with these and they were delivered to a gallery shop in Phoenix.

Sunday, April 26, 2015

Nature Photography In The Woods Citrine Ring

Some of the things I make are a bit more rustic, so it's fun to photograph them out in nature.  Sometimes Mother Nature surprises you and the weather can change fast.  My destination was over 7,000 feet, the wind whipped up and the temperature cooled as it plunged to 47.

I always have some sort of bag with supplies, extra clothing, food and water.  Hats are super handy because they not only shade you from the sun, but they keep your head warm and help block the wind.  Not to mention food, water and other supplies that are a good idea to bring with while going on an adventure.

I had multi-layers of shirts and sweaters and also blankets and beach towels.  One of the beach towels came in handy for a wind break.

I hiked over to some favorite boulders to click some photos with my i-Phone.  I have a really nice full size camera, but I use the camera phone on quick trips like this.

Items photographed in full shade really look the best.  Since it was overcast, it was a little challenging to find full shade.  I've used the same boulders before, so I had a feeling the location and time of day would work fine.

Certain background colors work well with certain items.  Some background colors enhance and some do not.  Try to photograph your item on various backgrounds.  Copper on a rust color might not always work and sometimes granite will look better.

I will take several photos of a scene and move the camera angle slightly each time.  I will also tend to bring the camera back from the piece as well.  This will change the focus each time.

There is a lot of texture to the wire wrapping and even the underlying boulder.  You will notice each photo will look a little different.  Some of the photos of this ring had a clear shot of the wrapped shank, cord or boulder.  I was looking for an overall focus on the item.  There are other times I do want one area in focus and another area more blown out of focus.  Just take plenty of photos! 

I've many times set up an area to photograph items with props, clicked photos, taken down my area, gone inside to review photos and have discovered, I've somehow missed my mark.  The best thing I've learned is to vary the camera angle and move back a bit.

I photographed the ring on various sides and angles.  There were two boulders and a bunch of pine needles between them.  I used those to prop up the ring.  I also found an old sun dried piece of wood to use as a mandrel.  It all seemed to work.  Just look around and toss some found objects into the photos while out in nature.

It's possible to take really good photos of your work in any setting.  It just takes practice and you don't need an expensive amount of equipment.  A camera phone may just do the trick! 


Friday, April 10, 2015

Scroll Cross Revision

I decided to add a large, deep purple amethyst briolette to the bottom of the pendant.  I also made the necklace to be adjustable to lay just right with various collars.  It's now sitting in a display case on a black velvet form, waiting for someone to take it home.

Thursday, April 2, 2015

Scroll Cross in Sterling with Amethyst


I made this cross with various gauges of sterling silver wire.  I built a frame and layer by layer, added hand bent and formed sterling scrolls.  I added silver beads and a micro faceted amethyst bead in the center.

This was completely made with cold connections and no soldering was used.  I cannot say it was all a wrapped piece, but imagine sewing with super fine sterling wire.  In, out, up and over I went with the wire to secure the scroll pieces to the frame.  You have to be very careful to keep the wire in a loop and not pull it and kink it.  If that happens, you have to carefully unbend and straighten the wire.  A good pair of nylon jaw pliers are really one of the most important tools.  I use it to straighten and to also press wire in some areas to tighten things.  My less expensive pair works better than the higher quality ones I purchased.  

My favorite tool to cut the small wires would be small nail clippers.  They are curved and can get into tight areas usually without cutting other pieces.  I have several sets of clippers in pretty much every tool box and work area.  They work great and are very inexpensive.  The price of the tool doesn't always dictate how great it will work.  I have good pliers and special tools, but the little wire trimmers I use are simple nail clippers.  If you don't have power tools, you can file the ends, use sand paper and I have even used emory boards, then sand.  Experiment and see what works for you.  

The beads are also wired in at various locations.  The wire around the stone that looks like a bezel is a heavier coiled wire.  The bale is larger to accommodate the sterling chains with amethyst and sterling   beads.  This could also be worn on a heavy black cord or velvet ribbon.  If you wear something like this on a black cord or ribbon worn over my usual black crew neck t-shirt, it will look like it's floating.

I added a double wire loop to the lower back of the tip to add a dangle.  I may add a pear shaped pearl or amethyst briolette.  Still working through some final details.

This wire wrapped and cold connected style of work is inspired by some pieces I've seen made in Eastern Europe.  I haven't seen any crosses like this and this is my own design.  Every piece I construct is one of a kind and unique.  

This has an old world look with the patina that darkened it.  The scrolls remind me of architectural elements with their detail. It is strong and delicate at the same time.

About Me

My photo
I enjoy silversmithing, making jewelry, beads and working with paracord. I sculpt in polymer clay and desert themes are my favorite. I'm always looking for ways to incorporate the beauty of nature into my work. My work has been published in a large book called "1000 Beads," Lark Jewelry and Beading, 2014. I have sold beads through the Glendale Bead Museum Shop, a gallery in Tucson and www.wearartbyjulie.etsy.com. I'm an artist currently showing my jewelry at the Shemer Art Center in Phoenix, AZ.